Wall Preparation Before Painting in Kothrud & Dhayari, Pune
A fresh colour cannot hide a surface problem for long. Before choosing a shade, walk through the wall condition, repair plan and coating sequence with your painter. This checklist is useful whether you are repainting one room or preparing several rooms during a renovation.
Published 5 October 2026 · Homeowner planning guide
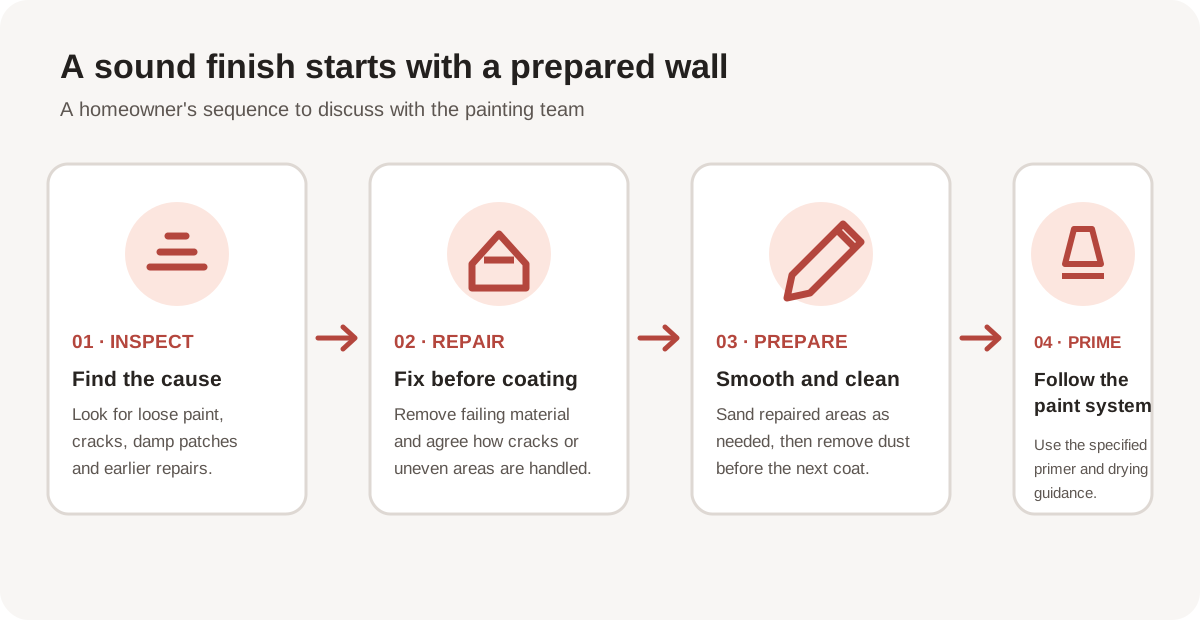
1. Inspect before deciding what to apply
Look across each wall in daylight and note peeling or chalky paint, hairline marks, larger cracks, stains, uneven patches and signs of dampness. Tap or gently check areas where plaster appears loose. Make a room-by-room list and take clear photographs so the same defects can be discussed during the estimate.
Ask what may be causing a stain or crack before covering it. Paint and putty are finish materials; they do not solve an ongoing leak, persistent dampness or movement in a wall. If you find recurring moisture, a wide or growing crack, or loose plaster, ask for the underlying issue to be assessed before finishing work is planned.
2. Agree on the repair scope
Walk through the marked areas with the contractor and record which defects will be scraped, filled, patched or referred for further inspection. Clarify whether the estimate covers only local touch-ups or broader surface levelling. Confirm how existing paint that is loose or powdery will be removed and how the room and nearby fittings will be protected.
For a repaint, a sound existing surface may need a different preparation plan from a newly plastered wall. Tell the painter what you know about earlier coats, repairs and stains; if the history is unclear, ask how the proposed system will be checked on site before it is applied widely.
3. Prepare a clean, even surface
Once repairs are complete and ready for the next step, the surface may need sanding or levelling as appropriate to the chosen finish. Dust should be removed before primer or paint is applied. Ask how the team will manage sanding dust, cover floors and furniture, and keep adjacent rooms usable during the work.
Check the wall under normal room lighting after the repair and preparation stage. Raking light from a window or fixture can reveal ridges and patch edges that are harder to notice straight on. If smoothness matters for your chosen finish, agree on what will be reviewed before colour coats begin.
4. Match primer and finish to the surface
Primer selection depends on the wall condition, existing coating and the paint system. Ask the contractor to identify the proposed primer and finish, including sheen, and to follow the product instructions for application and drying between coats. Do not assume the same preparation is suitable for every room or substrate.
Before the full finish coat, review a small colour sample in the room at different times of day. Note the product and shade details so the approved choice is clear. Keep the room ventilated as directed on the product label and allow the recommended time before moving furniture close to freshly painted walls.
Questions to settle before the painting starts
- Which rooms and wall areas are included in the preparation scope?
- How will loose paint, cracks, stains or uneven patches be handled?
- What primer and paint finish are proposed for each surface?
- How will furniture, floors, switches and adjacent work be protected?
- When can the homeowner inspect preparation, sample colour and final finish?
Write the answers into the project notes or estimate. Clear scope makes it easier to compare proposals and reduces confusion about what is included.
Continue planning your interior work
Surface preparation is easier to coordinate when it is discussed alongside other work that affects walls and ceilings. Browse the homeowner planning guides, review the services overview, or use the Cost Calculator to start organising your project information.
Plan your painting estimate
Choose how you would like to continue. Check location availability and discuss the rooms, wall condition and preparation scope.